Foreword
Amongst the modding audiophile community there is a small band of people who are after the best possible sound from their portable audio players. The concept is simple, bypass all the poor quality SMD components and feed the DAC (Digital to Analog Convertor) output directly in to an external high quality headphone amp.
While the concept is simple, execution is another matter – The player needs to be opened up and the DAC output needs to be wired to the nearest conveniant output connector, most people opting to use redundent pins on the docking ports. Due to the presence of DC voltage on the output of the DAC this neccesitates the need for capacitors in-line. To maintain the quality that you are trying to achieve this means using bulky audio grade capacitors which would never fit inside the player, hencing leading to special docking connector, etc, etc, etc.
I stumbled on one such thread where a gentleman by the name of Eric Guerizec from France had combined using my iFlash adaptor with his pursuit of audio fidelity. The quality of his workmanship was so good I invited him to write an article about it.
Here is his story……
Introduction
After spending many days looking for my mp3 player, I decided to buy the 30Gb 5.5g iPod but I did not want to use their propriety ITunes. I bought the iPod because I discovered Rockbox (www.rockbox.org), the free software replacement for iPod, Iriver and other mp3 players. The first thing I did when I received my iPod was to install Rockbox. Using Rockbox is fun.
I can manually transfer songs without any additional software. Some of the Rockbox features are great: FLAC Support, equalizer, cross fader, user-definable interface, and gapless playback. But there are so many things we can do with the iPod 🙂
I wanted very much to replace the hard disk with a memory card. The fall in prices of Compact Flash cards was the opportunity to have a nice mp3 flash player with 32 Gb of memory. I used Tarkan’s adapter to perform this first hack : the famous iFlash adapter. I was not disappointed! The build quality is excellent and this adapter fits perfectly into the iPod. I bought a 32Gb CF card on eBay and it works great with the iFlash adapter.
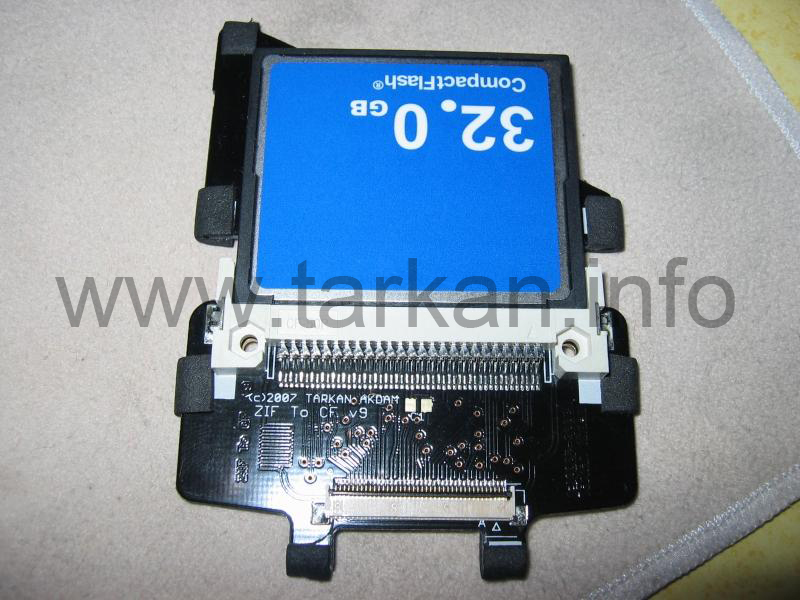
Installing the iFlash adapter and the CF card into the iPod is very easy. Be careful not to damage the iPod when opening it. The first time, I used a faulty iPod to have a try and I broke the LCD screen, oops! So the second time, I took one’s time to open my iPod successfully. This mod truly rocks : the user interface is smoother and there is no waiting normally caused by the hard drive.
I spent some serious time reading the Apple diyMod thread on the Head-Fi forum. Take a look at : http://www.head-fi.org/forums/f6/apple-diymod-my-take-famous-imod-56k-killer-featuring-3g-4g-5g-nano-1g-269604/. The author Joneeboi has done a very good and interesting job. The aim of the diyMod is to run the audio out from the Wolfson DAC and bypass the “poor” onboard components.
Usually, most of the head-fi’ers use a special cable with a pair of 47uF Black Gate capacitors. The Black Gates have probably the best size to performance ratio. The disadvantage of this method is that there is not a good way of playing the iPod through the line-out without building a custom dock connector.
The iFlash adapter is the solution to performing the audiophile hardware hack with internal caps. When you replace the hard drive with the iFlash adapter, you have enough space to fit two capacitors. Only small capacitors can be used like Black Gate NX Hi-Q 6.3V 22uF or 47uF. The advantage is that you have a really portable diyMod iPod that can be used with a regular line out dock. The disadvantage is that obviously you couldn’t use better caps than the ones that fit internally.
If you want to do this mod, I recommend you to read carefully the first page of Joneeboi’s thread on Head-Fi.org. You will find all the information you need and links to excellent tutorials.
The Surgery
Performing this hack is not very difficult but I can’t tell you it’s easy. Of course, it depends on your soldering experience. You need a temperature controlled soldering iron with fine conical tip.
As I am not in the habit of soldering and desoldering tiny components (SMD), I used a broken iPod to have a try. It’s necessary to use a magnifying glass because the PCB pads are very small and delicate and it’s useful to make sure that there is no shorting to any neighbouring components.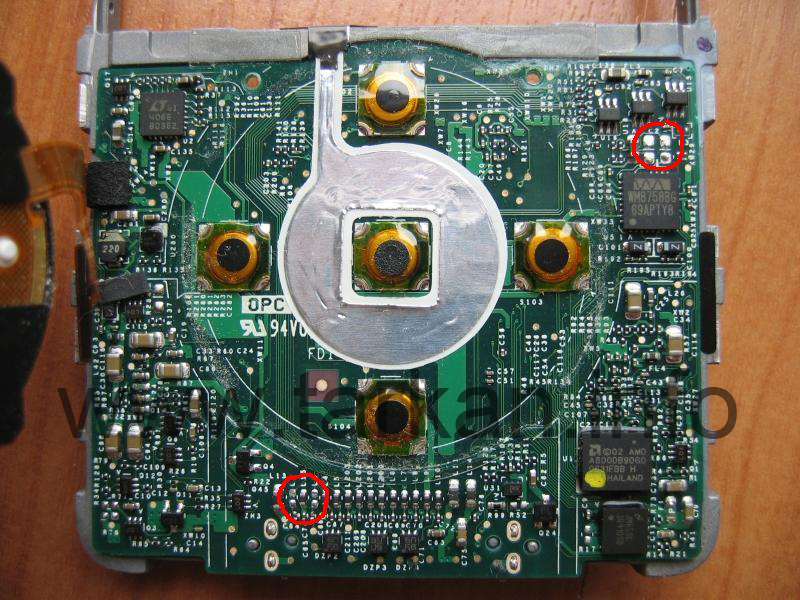
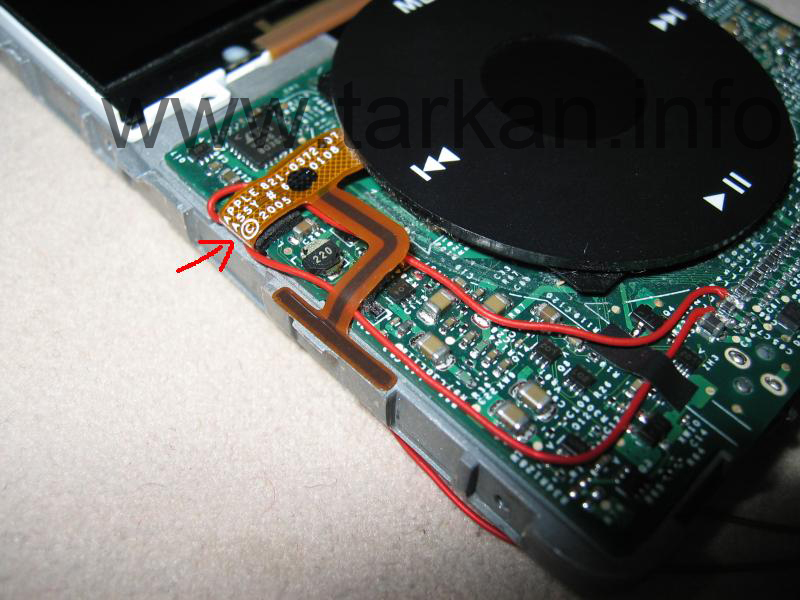
After opening the 5g iPod, you need to separate the logic board from the front panel. I recommend you to keep the logic board and the metal framework together and it’s not necessary to remove the clickwheel. The first step is to desolder the coupling capacitors near the DAC, the inductors near the dock, and the capacitors that comes right after the dock inductor.
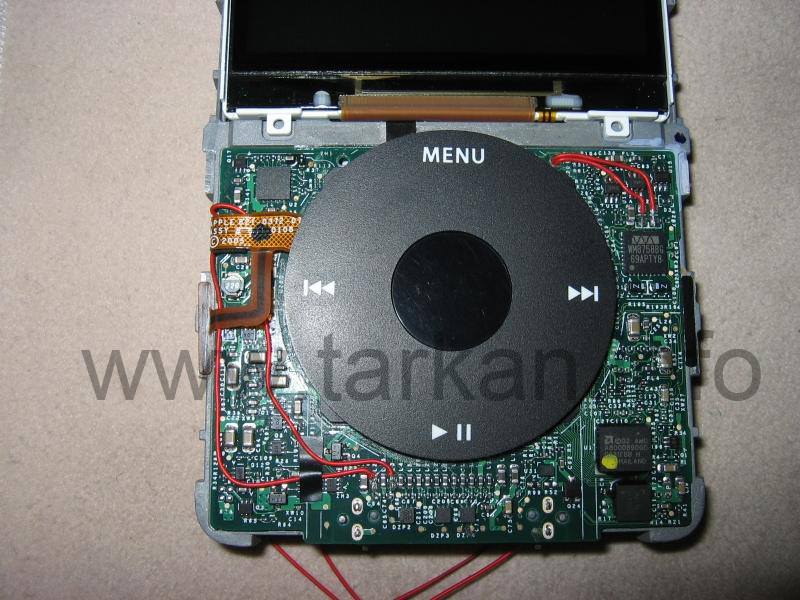 Next, you have to route the wires from the pads near the DAC to the pads near the dock. The goal is to route the audio signal from the DAC to the internal capacitors then to the dock connector. You need to use a very thin cable. I used 30 AWG single strand wire. Of course, be careful when soldering anything. You have to find the best path for your wires that do not prevent the closing of the front panel. Make sure that the wires are not too close to the clickwheel.
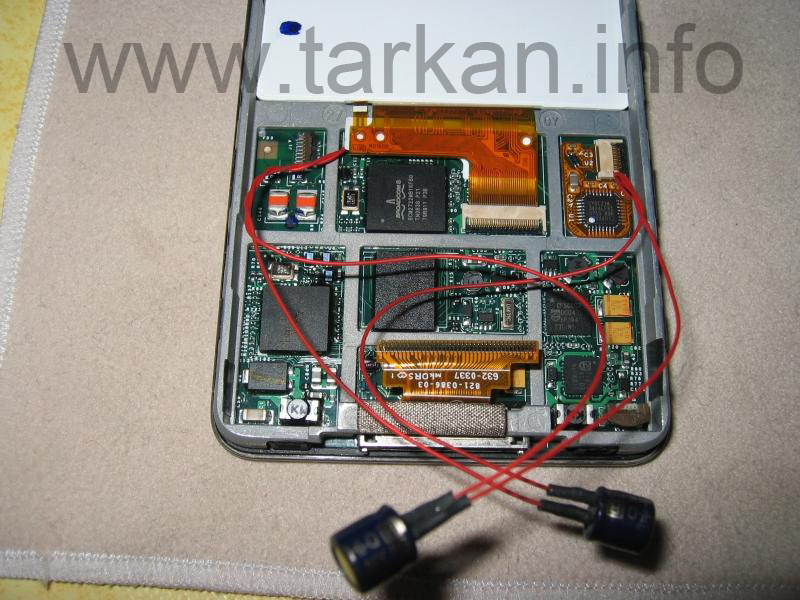
I used a little hole on the board to route the wires from the DAC. I was obliged to drill the back of the front panel just enough for the thickness of the wires.
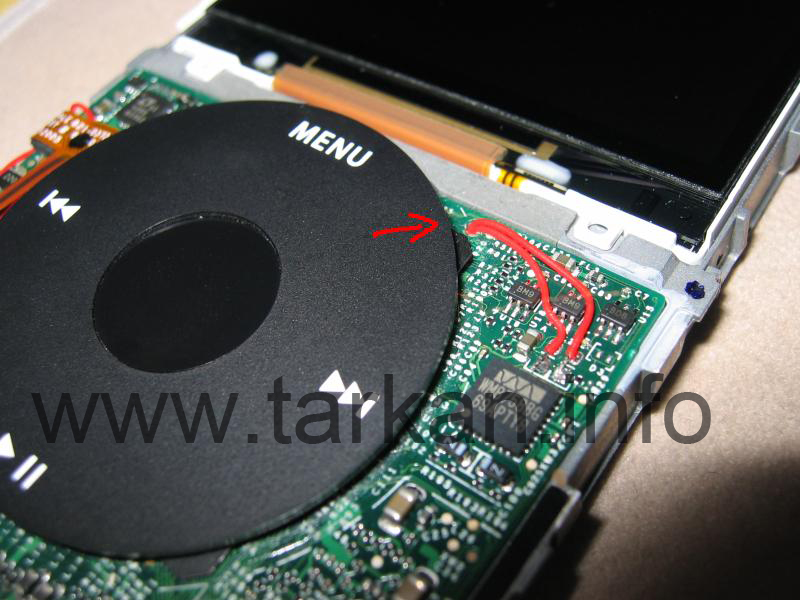

 There is a space near the clickwheel ribbon where the wires could be routed to the dock pads. I used adhesive to secure the wires down the specified path.
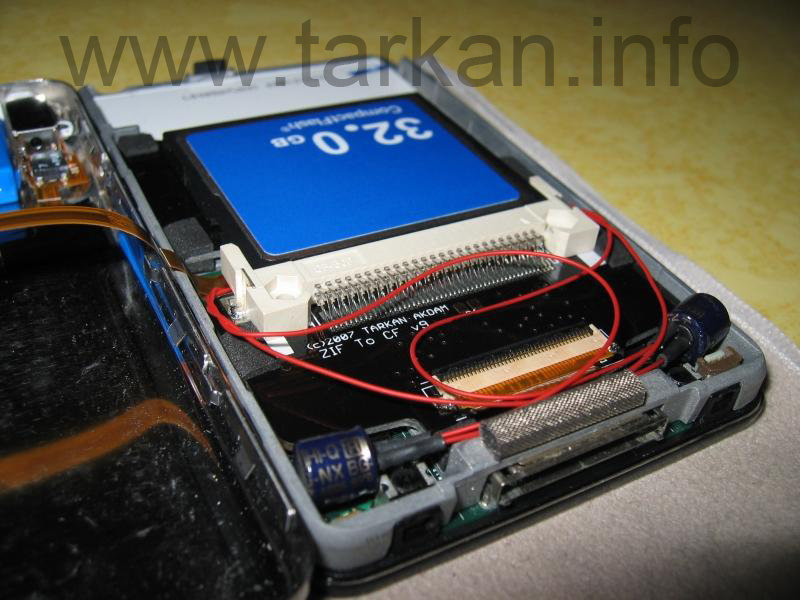
There is more wiring than the classic diyMod (with external caps) because the caps must be connected on the other side of the board. The two caps are inserted from side to side the ZIF conector, it was the only location that I could have enough space. The screenshots show you this arrangement.
Finally, close the iPod and enjoy the pure audio straight from the source!
Conclusion
Let’s be clear, this mod is not for everyone. But if you spend a lot of time listening to music through your headphone amp, the diyMod may be of interest to you.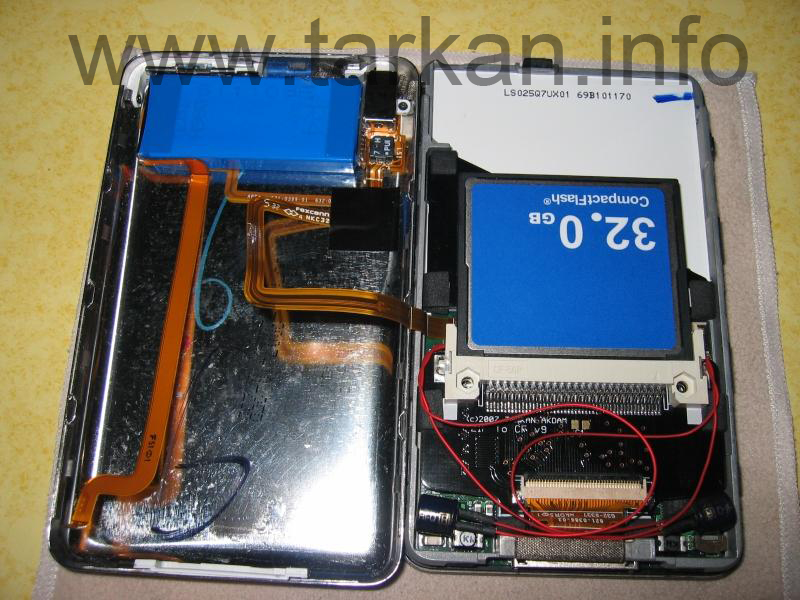
Is it worth trying? Go on Head-Fi.org forum to read the discussion in the Apple diyMod thread and make your own opinion. If you use Tarkan’s adapter, I proved that internal caps (only Black Gate NX Hi-Q 6.3V 22uF or 47uF) was a possible option. This mod will also allow you to use your headphones through the headphone jack.
I love listening to my diyMod iFlash iPod. I use it with the fantastic Headamp Pico amp, this rig is ultra portable and it sounds very nice!
All images copyright Eric Guerizec – used with permission.
Postscript
I would like to thank Eric for putting the article together and producing a very high quality mod.
Hello, I have seen people do the audio capacitor bypass using the diyMod on the 5/5.5 gen and older. But none for the 6th gen which is what I have. The main reasoning seems to be that its already almost direct?
Well I want to do it anyways, but I don’t know where the solder points on the 6th gen are. Can anyone help me out there?
Also in the guides they use 47uf 6.3v caps. I have one of them but its from a “junk” company. I have some much higher quality Sanyo caps but they’re 100uf 16v. I know the voltage doesn’t really matter but what would the capacitance affect? Thanks.
Is it possible to get digital audio out from the iPod to go into the new-ish ifi hip dac?